

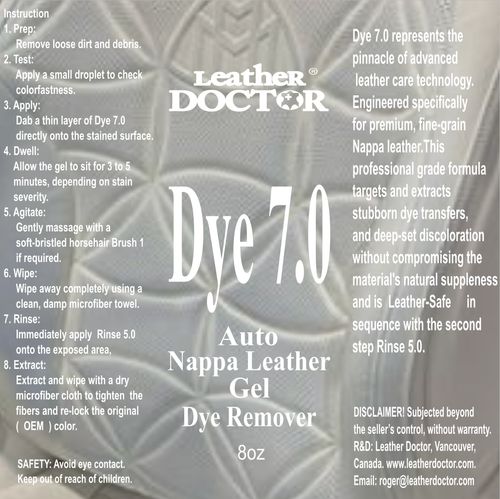
Leather Gel Dye Remover 7.0
- Controlled Gel Extraction for Dye Transfer and Surface Discoloration
- Target and extract unwanted dye transfer with controlled gel application.
Leather Doctor® Leather Gel Dye Remover 7.0 is a professional dye-transfer removal formulation designed for suitable finished leather where transferred dyes, inks, and other external colorants have discolored the surface.
Its controlled gel consistency helps keep the working chemistry concentrated where it is applied, allowing localized treatment without unnecessary spreading.
The formula is designed to help:
- Loosen transferred dyestuffs
- Emulsify and mobilize external color contamination
- Support controlled extraction from the leather surface
- Minimize unnecessary mechanical abrasion during stain removal
The treatment is completed with the appropriate Leather Rinse 5.0 to remove the released contamination and working chemistry.
The Dye Remover releases. The Rinse removes.
Designed for Controlled Dye-Transfer Removal:
Leather can become discolored when external dyes or inks transfer from:
- Dark clothing
- Denim
- Printed materials
- Newsprint
- Other dyed textiles
- Surface-contact materials
The contamination may appear as:
- Blue or black dye transfer
- Printed ink marks
- Dark transfer films
- Localized discoloration
- Repeated-contact dye staining
Leather Gel Dye Remover 7.0 is designed for suitable finished leather, including selected:
- Nappa leather
- Merino leather
- Semi-aniline leather
- Other compatible finished leather
Because leather finishes vary by manufacturer, age, construction, color, and condition, always test first in an inconspicuous area.
Why Leather Gel Dye Remover 7.0?
pH-Targeted Formula — pH 7.0
The formulation is calibrated to a target pH of 7.0 for its intended dye-transfer removal application.
The pH is part of the overall formulation strategy; it does not mean that every leather should automatically be treated with a pH 7.0 product.
Controlled Dye Extraction
The formulation is designed to help loosen, emulsify, and mobilize external dye transfer and related discoloration so that the released material can be removed from the leather.
Gel-Controlled Application
The gel consistency provides greater control than a free-flowing liquid.
It helps concentrate the working treatment on the affected area and reduces unnecessary spreading into:
-
Adjacent leather
-
Stitching
-
Seams
-
Perforations
-
Different materials
Reduced Mechanical Action
Dye transfer can sometimes be removed more safely by allowing the chemistry to do more of the work rather than relying on aggressive rubbing.
Controlled application and extraction can therefore help minimize unnecessary mechanical wear to the finished surface.
Aerosol-Free
A controlled liquid-gel formulation designed for localized application during professional restoration and careful leather care.
Why Use a Gel?
Targeted Cleaning. Controlled Contact.
A conventional liquid may spread rapidly across a finished leather surface.
The gel format helps the product remain where it is applied, allowing a measured amount of chemistry to work on the affected area.
This is especially useful around:
-
Perforations
-
Stitching
-
Seams
-
Seat contours
-
Bolsters
-
Armrests
-
Other adjacent materials
Do not flood the leather.
Use only enough product to treat the affected area effectively.
What Does Leather Gel Dye Remover 7.0 Target?
This product is intended primarily for external color transfer, including:
-
Denim dye transfer
-
Clothing dye transfer
-
Dark textile transfer
-
Newsprint and printed ink transfer
-
Other removable surface-associated dyestuffs
It is not intended to restore the original color where the leather's own finish or pigment has been permanently altered.
A stain that remains after appropriate extraction may represent:
-
Permanent dye penetration
-
Finish discoloration
-
Pigment alteration
-
Abrasion or polishing
-
Chemical damage
-
Another condition that requires a different restoration process
The Leather Gel Dye Remover 7.0 + Leather Rinse 5.0 Module
Dye Removal → Rinse → Dry → Inspect
Leather Doctor treats dye-transfer removal as a coordinated extraction-and-removal process.
Step 1 — Leather Gel Dye Remover 7.0
Release & Extract
Apply the gel directly to the affected area and allow the formulation to loosen and mobilize the transferred color.
Use controlled mechanical action only when necessary.
Extract the released contamination with a clean towel.
Step 2 — Leather Rinse 5.0
Remove Suspended Contamination & Working Chemistry
Leather Rinse 5.0 is the formulated removal stage.
It is designed to help remove:
-
Released dye contamination
-
Suspended soil
-
Residual working chemistry
-
Working surfactant
It is not simply pH-adjusted water and is not primarily a conditioner or “stabilizer.”
Complete Module
Leather Gel Dye Remover 7.0 → Leather Rinse 5.0 → Dry → Inspect
The leather should be allowed to dry before determining whether additional conditioning, protection, repair, or refinishing is required.
Why the Rinse Matters
After dye-transfer treatment, the leather may still contain suspended contamination and working chemistry from the extraction process.
Simply wiping with water does not necessarily provide the same removal function as a purpose-formulated rinse.
Leather Rinse 5.0 helps complete the removal process.
The Dye Remover releases the unwanted color. The Rinse removes the released color and working chemistry.
Localized Dye Removal
For light or recent transfer, controlled localized treatment may be sufficient.
Basic Method
1. Test
Test the product on an inconspicuous area.
2. Apply
Apply a small amount of Leather Gel Dye Remover 7.0 directly to the affected area.
3. Work
Allow the gel to dwell and work according to the condition of the stain and the leather.
4. Extract
Remove the released contamination with a clean towel.
5. Rinse
Apply Leather Rinse 5.0 and extract the remaining working chemistry.
6. Dry
Allow the area to dry naturally.
7. Inspect
Evaluate the result before repeating or introducing another treatment.
Do not continue working simply because discoloration remains. Determine whether the remaining color is still removable external transfer or permanent alteration of the leather itself.
Reverse Transfer Technique
For Stubborn or Ingrained Dye Transfer
When direct localized extraction produces limited results, a Reverse Transfer Technique may provide a more controlled alternative to repeated rubbing.
The principle is to create a controlled interface between the affected leather and an absorbent support so that released dyestuff can migrate away from the leather and into the support material.
Method
1. Prepare the Interface
Place a clean, absorbent towel or suitable absorbent paper over the affected area.
2. Lightly Moisten the Support
Use enough distilled water to establish a damp interface without flooding the leather.
3. Apply Leather Gel Dye Remover 7.0
Apply the gel to the absorbent support over the affected area so the treatment can migrate gradually toward the leather interface.
4. Allow Controlled Contact
Permit sufficient contact time for the dye-removal chemistry to work and for released dyestuff to migrate into the absorbent support.
5. Remove the Support
Carefully lift the support material and inspect the transferred dye.
6. Repeat When Appropriate
A fresh support may be used for another controlled cycle when additional removable dye remains.
7. Complete with Leather Rinse 5.0
Once the dye-removal treatment is complete, apply Leather Rinse 5.0 to remove remaining suspended contamination and working chemistry.
8. Dry and Inspect
Allow the leather to dry fully before evaluating the final condition.
Why Reverse Transfer?
Less Mechanical Friction
The technique reduces the need for aggressive rubbing directly against the finished leather.
Controlled Extraction
Released dyestuff can migrate into an absorbent support rather than remaining concentrated on the leather surface.
Useful for Repeated Dye Transfer
The technique can be useful where transferred color is persistent and direct wiping alone produces insufficient extraction.
The objective is controlled extraction, not prolonged chemical exposure.
Do Not Confuse Dye Transfer With Finish Damage
Not every dark or colored mark is removable dye transfer.
Before repeating treatment, determine whether the remaining appearance is actually:
External dye transfer
or:
Permanent alteration of the leather finish.
Leather Gel Dye Remover 7.0 does not repair:
-
Finish wear
-
Abrasion
-
Pigment loss
-
Polishing
-
Cracking
-
Permanent staining
-
Chemical damage
-
Structural deterioration
Once removable contamination has been extracted, stop and reassess the leather.
After Dye Removal: Dry Before the Next Treatment
The correct sequence is:
Extract → Rinse → Dry → Inspect
Do not automatically apply conditioner immediately after dye removal.
Once dry, assess:
-
Color uniformity
-
Surface feel
-
Finish condition
-
Absorbency
-
Remaining discoloration
Then determine whether the leather actually requires conditioning, protection, repair, or refinishing.
Where Leather Gel Dye Remover 7.0 Fits
Leather Gel Dye Remover 7.0 is a targeted contamination-removal product, not a complete leather restoration system.
Its purpose is to remove external dye transfer and related removable discoloration.
After the contamination is removed, the leather should be evaluated independently.
Remove the contamination first. Diagnose the leather second. Restore only what the leather actually needs.
The Leather Doctor Approach
Restore the Leather. Refine the Surface. Preserve the Future.
A transferred blue or black mark does not automatically mean the leather itself has been damaged.
First determine whether the appearance comes from:
External dye transfer.
Ink.
Surface residue.
Finish alteration.
Abrasion.
Permanent color change.
Leather Gel Dye Remover 7.0 addresses the removable external contamination.
Leather Rinse 5.0 completes the removal of released contamination and working chemistry.
Drying and inspection then reveal the leather's actual condition.
Target the transfer.
Release the unwanted color.
Extract the contamination.
Rinse away the working chemistry.
Dry and inspect.
Then restore what the leather actually needs.
Important
Always perform an inconspicuous test before full application.
Leather finishes vary by manufacturer, age, construction, previous treatment, and condition.
Do not assume that all Nappa, Merino, or semi-aniline leather will respond identically.
Avoid excessive moisture and uncontrolled spreading into perforations, seams, stitching, or adjacent materials.
Stop treatment when the remaining discoloration appears to be part of the leather's own finish rather than removable external transfer.
Related Product
Leather Rinse 5.0
The formulated removal rinse for removing suspended contamination and working chemistry after compatible leather treatment.
Leather Doctor® Leather Gel Dye Remover 7.0 represents the pinnacle of advanced leather care technology.
Engineered specifically for premium, fine-grain Nappa leather.
This professional-grade formula targets and extracts stubborn dye transfers, and deep-set discoloration without compromising the material's natural suppleness and is Leather-Safe™ in sequence with the second step: Rinse 5.0.
Key Benefits
Advanced Molecular Extraction:
Dislodges deeply embedded denim dye and newsprint ink.
Nappa-Safe Chemistry:
Preserves the delicate, topcoat of premium leather.
Zero Resurface Damage:
Cleans effectively without stripping original factory finishes.
Moisture-Lock Protection:
Hydrates fibers during application to prevent drying or cracking.
Product Features
Penetration Depth Technology
Dye 7.0 uses a specialized slow-evaporating gel base.
This allows the active ingredients to safely dwell on the surface, drawing stains upward out of the pores rather than pushing them deeper into the hide.
Chemical Synergy:
- If the leather remained at a pH of 7.0, the fibers would remain swollen and vulnerable to abrasion, water, and future stains.
- Immediate application of Stabilizing Rinse 5.0 acts like a "chemical switch".
- It instantly returns the leather to its natural acidity, tightens its molecular structure, and re-locks the original ( OEM ) protective barrier.
Precision Gel Viscosity
- The thick, non-runny consistency ensures maximum control during localized spot treatments.
- It stays exactly where you apply it, preventing accidental runoff onto adjacent stitching or different materials.
Specifications
- Size: 4oz, 8oz, 16oz, & 32oz.
- Type: Mix and fill with distilled water before use.
- Container: Precision-tip squeeze bottle
- Consistency: Medium-viscosity clear gel
- Compatibility: Nappa, Merino, and Semi-Aniline leathers
- Origin: Made in Canada.
Instruction:
1. Prep:
Vacuum the area thoroughly to remove loose dirt and debris.
2. Test:
Apply a small droplet to an inconspicuous area to check colorfastness.
3. Apply:
Dab a thin layer of Formula 7.0 directly onto the stained surface.
4. Dwell:
Allow the gel to sit for 3 to 5 minutes, depending on stain severity.
5. Agitate:
Gently massage with a soft-bristled horsehair brush if required.
6. Wipe:
Wipe away completely using a clean, damp microfiber towel.
7. Rinse:
Immediately apply Stabilizing Rinse 5.0 onto the exposed area,
8. Extract:
Extract and wipe with a dry microfiber cloth to tighten the fibers and relock the original ( OEM ) color.
Advanced Instructions:
The Reverse Transfer Technique
1. Prepare the interface:
Lightly dampen Towel 5 or absorbent paper.
2. Place the Support:
Apply the damp towel directly and flat onto the stain.
3. Saturate through the Towel:
Apply Dye Remover 7.0 directly to the top of the towel, just above the stained area.
Allow the liquid to saturate the fabric so that it slowly migrates downwards to the leather interface.
4. Contact Time (Dwell Time):
Leave for 12 to 24 hours .
During this time, the pH 7.0 solvent will emulsify the embedded dyestuffs.
Through continuous capillary action, the absorbent towel will draw in and trap the released dyestuffs.
5. Peel and Reveal:
Gently peel off the towel.
The emulsified stain will detach with the fabric, revealing a clean surface without any mechanical friction.
6. Fix and neutralize (Crucial):
Immediately apply Stabilizing Rinse 5.0 onto the exposed area, then extract and wipe with a dry microfiber cloth to tighten the fibers and relock the original ( OEM ) color.
Zero Mechanical Action:
No risk of wearing down or scratching the original finishes of the leather through excessive friction.
Deep extraction:
The prolonged contact time (12-24h) dislodges hydrophobic dyestuffs that have migrated deep beneath the surface.
Molecular Safety:
Thanks to the neutral pH of 7.0 of the surfactant, the leather tolerates this prolonged contact without chemical alteration, provided it is immediately stabilized in the next step with Stabilizing Rinse 5.0.
⏱️ Time stages (At room temperature / 20-22°C)
- 15 to 20 minutes (Recent/Light Stains) : This is the minimum time for Dye 7.0 to create the necessary moisture to soften the top coat and initiate capillary action towards the towel.
- 30 minutes (Recommended time for reverse transfer) : The perfect balance point. The blue T-shirt dyestuffs migrate massively towards the damp towel without the surfactant having time to attack the underlying cream finishing.
- 45 minutes (Absolute maximum limit) [2]: Beyond this point, the distilled water begins to evaporate from the gel. The surfactant then concentrates massively on the leather and begins to saturate the binders of the factory polyurethane topcoat.
⚠️ The critical factor: The cabin temperature
The 45-minute rule only applies if the vehicle is parked in the shade and the leather is at room temperature.
If you apply this gel in a car parked in direct sunlight (where the seats can easily reach 50°C to 60°C):
- The maximum contact time must be divided by three, i.e. a maximum of 15 minutes .
- At high temperatures, the chemical kinetics accelerate: the surfactant becomes much more aggressive towards the topcoat and the gel risks drying too quickly, which would permanently trap the soot or ink in the pores of the leather.
Reminder of the Exit Protocol (Rinsing)
Once the time is up (30 to 45 minutes), quickly remove the towel and immediately apply your Stabilizing Rinse (pH 5.0) . The acidity of the rinse will stop the action of the Dye 7.0 and instantly tighten the pores of the Nappa polish.


